Configuring IntelliSight Devices: Camera Setup
Adding a Receding Traffic Zone
A receding traffic zone can be set up and used to trigger an advanced zone at the next intersection to alert the controller that traffic is coming. A receding traffic zone should be placed far enough up from the current stop line so that any occluding traffic movement is not detected. Additionally, signs and any other objects should not be in the part of the zone where vehicles would be exiting.
Receding zones are ideally placed where there is maximum visual separation between vehicles, which is usually as close to the stop line as possible without undesired occluding traffic activating the zone.
Receding zones are ideally placed where there is maximum visual separation between vehicles, which is usually as close to the stop line as possible without undesired occluding traffic activating the zone.
1. On the Zone Setup screen, click Add Zone.
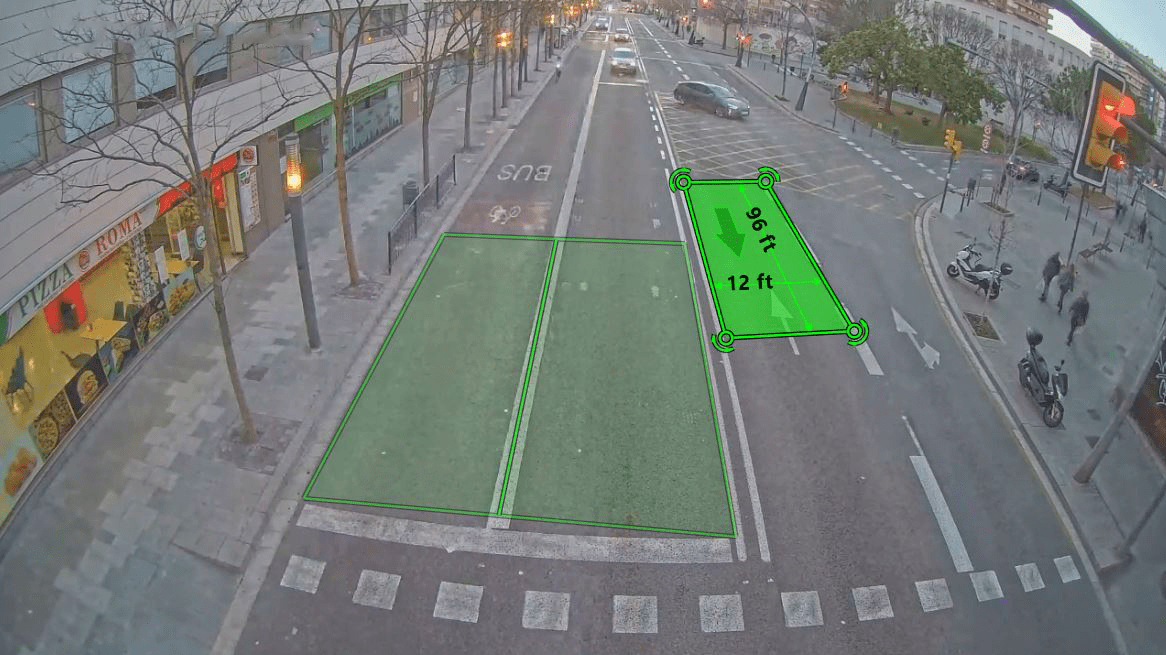
2. Move the cursor to one of the corner markers then click and drag to the desired location.
3. Repeat for each corner until the zone covers the detection area and lane lines are arranged so that they line up with the zone lines.
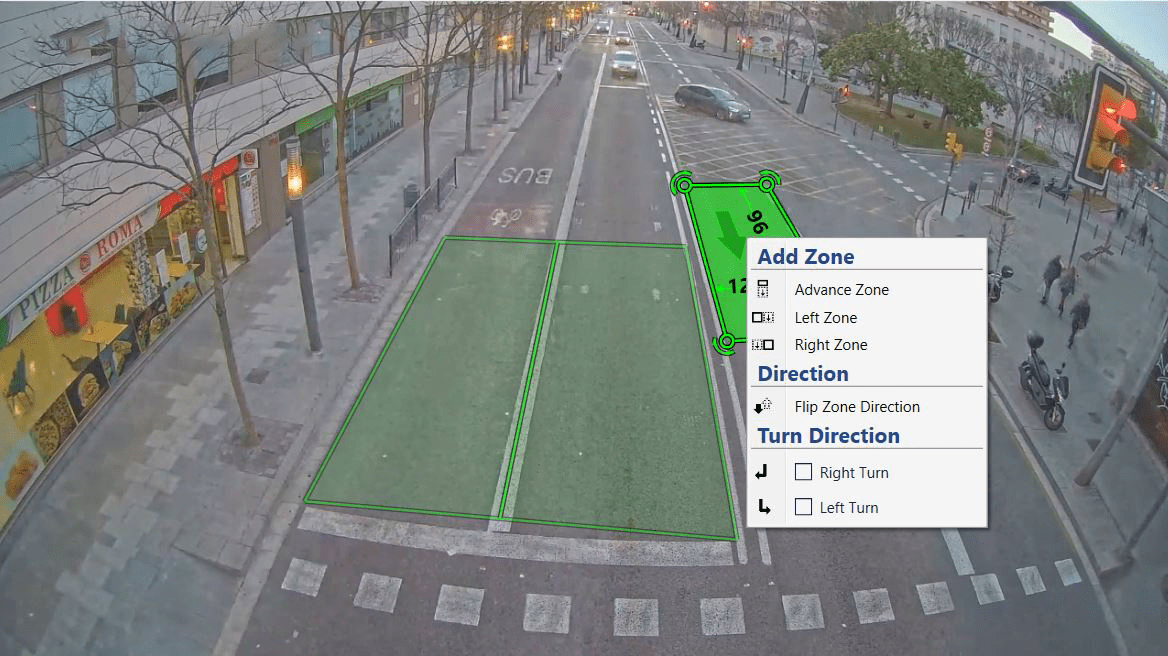
4. Right-click on the zone and select Flip Zone Direction.
5. To add additional zones similar to the previous one, right-click on the zone and select the appropriate option.
- Because of the direction change, to add a new zone to the right, select Left Zone; to the new zone to the left, select Right zone.
6. To change the zone description, highlight the description in the Easy Setup section and type a new description. Any nymber of alphanumeric and special characters can be used.
7. Assign Conditions, Actions, and Video Overlays as required.
- By default the vehicle presence condition is selected for each zone. In addition, green is selected for the zone display color when a vehicle is detected and gray when no vehicle is present in the zone.
- There is no default output assigned.
- For each selected condition (vehicle and bicycle presence) an output must be assigned unless the Set Output action is removed in either the Zones Explorer or Actions Explorer section.
- The Show Video Overlay check box is used to display overlays only when video is playing. The Show Setup Controls check box is used to display overlays on the Zone Setup screen for both static images and video.
- After all zones are defined and configured, it is recommended that the configuration be archived (see Saving an Archive File).
8. When complete, click Apply Changes.
Changes go into effect immediately and can be viewed live.
Version 4.3 - Copyright © 2024, Image Sensing Systems, Inc. All rights reserved.